Woodwork 101
 |
|---|
2/19/96
After some more measuring, a little trimming of the lower battery box, and
another cardboard model I finally committed the electronics board to the
real thing. I'm using 3/4 inch MDO board, which is essentially plywood
with a real smooth (paper?) finish on one side. This will look nice after
being painted and won't be conductive.
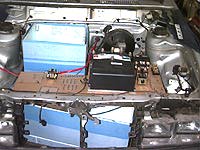
You'll notice that the layout has already changed from the preceding page. I've separated the control circuits (main contactors, shunts) from the support equipment (DC-DC, potbox, small relays, fuses, etc..) and moved the high voltage components away from the front of the car, which has lower clearance. I'm toying with fabricating a protective clear plastic cover for this whole assembly, but that will have to wait until later.
The bottom battery box is more or less in place and only needs a lid, batteries, wiring, and a tie down rig. The back (top) battery box isn't mounted but is sitting in place to provide placement measurements...and to let me feel like I might be getting closer to done.
 |
 |
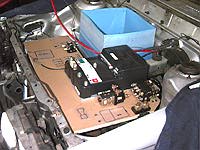
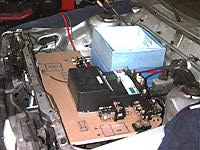
Two layout choices
I'll probably go with the second (right) layout since it moves the exposed connectors on the controller away from the front. The controller will be mounted slightly above the MDO board to allow for air flow and, since it is located near the front of the car, I may be able to rig it up so that air is blown under the controller whenever the car moves. Still, I have a DC muffin fan set aside for mounting on the bottom of the board to help with keeping things cool.
Speaking of keeping things cool: with this setup there isn't the need for the gaping (non-aerodynamic) holes in the front of the vehicle to dissipate combustion engine heat. I'm hoping the welding/body shop guy has some ideas on how I can close these off without making it look ugly. I'll only need a small amount of airflow for the controller. The bottom of the engine compartment can be closed off as well, helping to keep everything dry and clean. If I was really imaginative and/or had the time it would be nice to close off the entire bottom of the car, streamline it from front to back. Remember: no mufflers or really hot surfaces to worry about!
Next: Car Wiring
